Showing posts with label kitchen. Show all posts

Tuesday, May 26, 2009

More Work on Our Kitchen

Did you all have a wonderful long Memorial day weekend? While others around the country celebrated the holiday weekend at the beach, on the lake, having get togethers with friends and family, and having cookouts........we or should I say hubby worked. He worked installing our tumbled marble backsplash in our kitchen. It took both saturday and sunday to get it all installed. We do still need to grout the backsplash, apply the sealer and install the outlet covers, but I can say I LOVE IT!!


I'll be sure to show you the whole kitchen as sure as we have the backsplash grouted and all the outlet covers on.

Do they make a tumbled marble outlet cover??
Take Care
Darlene

Tuesday, May 19, 2009

My Cabinet Has Feet!

Today the Granite is Being Installed.....YIPPEE!!!! I am so excited to have counters again...nice smooth counters! Our cabinet feet arrived on friday and they were a bit too big, so my handy hubby modified them to fit. I Love that I am married to such a handy guy!! All you single girls out there...make sure you get a guy that is handy...you will be glad you did!

So without further ado....here is the before:


Here is the after....see my pretty feet!


Come back tomorrow to see pics of the installed granite counters.

Darlene

Thursday, May 14, 2009

Steps to Painting Your Wood Cabinets

Before:

Current:

We have had alot of people asking how we painted our golden oak cabinets. They wanted DETAILS. So decided I would just make a blog post about it so everyone would know how to transform their own cabinets. It is a big job, but like many of you we usually cannot or will not pay people for something we can do ourselves. We are just cheap...I mean frugal!

STEPS
1. Take all the doors off
2. Use a Liquid Sander on the doors and frames
3. Then use a 180 grit Sandpaper to remove any shine from the cabinets. (you do not have to sand down to bare wood)
4. Prime cabinets and frames with Zinsser Cover Stain Primer (we used WHIZZ 4" high-density foam rollers for doors and cabinets. (pack of 6 is about $6-$7) REMEMBER: 1 thin coat at a time...do not apply this heavy!


5. When primer is good and dry sand again with 120 grit sandpaper
6. Prime again and let dry
8. Use a thin coat of wood filler/putty on the doors/frames (this is the step that will cover the grain)
9. Once filler is dry...sand again
10. Now prime again
11. When the primer is good and dry (allow 1 day to dry good) you can start painting. When painting use a new 4" foam roller and same rule applies...several thin coats with letting the paint dry between coats is BETTER than one heavy handed thick coat of paint! Patience is the Key! (my color was custom mixed, it looks like melted french vanilla ice cream)
12. Once you have about 3 coats of paint on your doors and frames allow it all to dry for about 2 or more days.
13. If you want your cabinets to look antiqued or aged at all...now is when you would apply the glaze. Here are the directions on how to apply glaze. We used Valspar Mocha glaze. If not skip to step 12.
14. Apply a non-yellowing Polyurethane as a sealer & protector (I suggest 2-3 coats) Same rule applies as the primer & paint...thin coats, let dry between coats and use a new foam roller

15. Mount the doors back on the frames (We opted to go with hidden hinges this time, so for this we had to also make sure the previous hinge holes were filled in with wood putty before painting the frames and new slots were routered for the hidden hinges)
16. Now the fun part...attach the knobs that you have selected.


17. You can also add extra details to your cabinets like beadboard, trim, corbels, feet to the bottom of your cabinets. These feet were too little so we returned them and have ordered larger feet. Oh and we also painted the toe kick black to make it visually disappear so that when the legs/feet are installed it will look like a free-standing piece of furniture...more of a custom look.

I planned on using this corbel at our breakfast nook, but plans changed so you'll have to wait and see if it makes it into the kitchen or not. I wish now that I wouldn't have painted or glazed it..oh well, c'est la vie!

How about not putting a few doors back on and using baskets like this? It's very handy for those hard to reach areas!
Above the fridge......

18. Other details you can add to your kitchen is crown molding, a new sink, a new faucet, new appliances, new counters, under cabinet lighting...and don't forget your accessories. We also added a chalk board and a Farmer's Market sign.

19. VOILA...you have a NEW LOOK to YOUR OLD OR OUTDATED CABINETS! ENJOY!
Hope this Helps you all transform your kitchen cabinets (or any wood cabinet)
Darlene


Tuesday, May 12, 2009

If You Can't Find It....Make It!

I wanted to show you more photos of the kitchen remodel, but not much has changed since last week. Granite is suppose to be installed this week...so I'll show you then. However, I did want to show you a special something that I have in my kitchen (I actually posted it back in Sept of 2008, but I have alot more readers now then I did back then) so I figured a re-post would be fine!

The summer of 2007 when I shopped at the antique shops in Destin, Florida I located a very large old fruit stand sign with several layers of chippy faded paint. I thought "Wow, that would look so cool in a kitchen on a big wall." It would be a great statement piece. Unfortunately it was out of the budget so I had to pass on it. I kept thinking about the sign though and decided to start looking for an old "Farmer's Market" sign to hang in my kitchen. Why, did I want the sign to say "Farmer's Market"...well that's our last name. I couldn't find the large size that I wanted & if I did, it would probably be cost prohibitive!
Hmmm, wasn't ready to give up yet. So guess what I did?? Yeah, you guessed it...I made it! Hubby had the perfect size of wood out in the garage so I nicked it up with a variety of tools, such as hammers, ice picks, screwdrivers, and chains. Then I painted the wood black, added a crackle medium, then added a creamy gold color. Sanding came next, then on to painting the letters (I made the stencil). After the letters were painted and dry, I sanded again, banged it up a little more (great way to take out some agression), and drybrushed a brown on the sign so that it looked a bit dirty & weathered. Oh and I added some rusty iron medallions to each side that I got from Hobby Lobby.
It turned out very old & authentic looking! Just the look I wanted & fairly easy to achieve. Hubby was so proud of what I made that he showed a couple neighbors and they agreed it looked very old. Great, that's what I was after! What do ya think?
(you can click on photos to enlarge them)


So the moral of the story....if you can't find something or can't afford it..MAKE IT YOURSELF!!! You Can Do It!


Darlene

Wednesday, May 6, 2009

A Refrigerator and Cabinet Toe Kicks

Work is progressing on our kitchen. Our new refrigerator arrived yesterday...isn't she pretty!


Today I am going to be painting the toe kick area of the cabinets. (see the very bottom of the cabinet that is still golden oak) Most people would have just painted it the same color as the cabinets..but I've got to be different. I want to make the standard Kraftmade Cabinets appear more like furniture or at least like custom cabinets. So I'm painting the toe kick area black and then will add legs painted cream to match the cabinets.

This is the look I'm going for. Isn't this a GORGEOUS kitchen?!!! My kitchen makeover won't look that amazing, but it sure will look better and more up to date than it did!!


Well I better get to work. I'll show you how it looks when I get it done.

Have a Great Day!
Darlene

Thursday, April 30, 2009

Kitchen Counters Chosen

I went to the granite yard today and picked out my slab of granite. Yippee! I'm so excited!! You know how long we've been working on this kitchen! In case you don't know how long...we've been working on it on & off for over 1 year!! Not that it is a big kitchen at all. It's actually a small kitchen. It's just that hubby & I are doing it all ourselves and we haven't had much time between his regular job & running our business. I also didn't think we would be able to afford granite counters so was planning on butcher block counters. Thank the Lord we have been blessed with some extra money we didn't expect to have, so we are super excited to get granite! I chose New Venetian Gold.
Here is my precious slab of granite.


We have 2 weeks to finish painting the cabinets and build a pedestal for the breakfast nook. Oh, and I need to choose the backsplash. I'm leaning towards tumbled marble. I was going to do a mix of tumbled marble & beadboard, but hubby vetoed that idea. He would have had to move the outlets up higher and he didn't care to add more work to his already long honey do list. So, I better say goodbye for now and get back to painting!

Have a blessed day!

Darlene

Wednesday, April 22, 2009

Inspiring Family

Have you ever been captivated by a blog? One where you just keep reading through pages and pages and pages? Well, that is what happened to me the other night when I visited this blog.

I almost feel like I know her and her adorable family. She is a mother of 6 kids with 1 on the way. That alone is amazing to me, but even more amazing is that she homeschools all of the kids. She is an awesome Christian woman as is her family and they totally have their priorities in order! We could all learn something from her...I know I could! Oh, did I mention that she is a photographer too? Oh, well she is very talented as you can see from these photos.

**Click on the photos to make them larger**


Aren't they an adorable couple?! She is GORGEOUS & SKINNY after having 6 kids....I'm a bit jealous! She was 19, he was 29 when they married and their first kiss was on their wedding day! Such a romantic love story!
Alyssa & Robert

Their six super cute kiddos!


She is also a great decorator on a very limited budget. I think that is the true test of a great decorator! I mean, anyone can decorate if you have plenty of money. It's challenging when you don't have the funds. Take a look at their kitchen before she did her Magic.


And here is what a little paint can do to make it more inviting......

Here is the dining table they made


Huge cork board (Love the frames on the cork board...adds dimension)

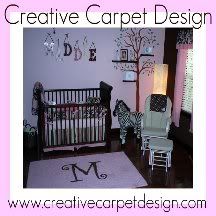
Look how pretty she made the baby bed

This is their daughter's precious room


Stop by her blog to see more of her life, kids, photography and decorating.
Let me know if you get captivated like I did!

God Bless!
Darlene


The Family

The Family